
Sections, separators and seams
How the Separator cuts the page into sections, what happens to components when you place it, move it or delete it, and how the seam draws the boundary between two sections. With diagrams.
A page is built from three parts: sections, components placed inside them, and separators that mark the boundary between two sections. The seam draws that boundary: a straight edge, or a wave, a curve… This page explains each part with a diagram.
Sections, components and separators
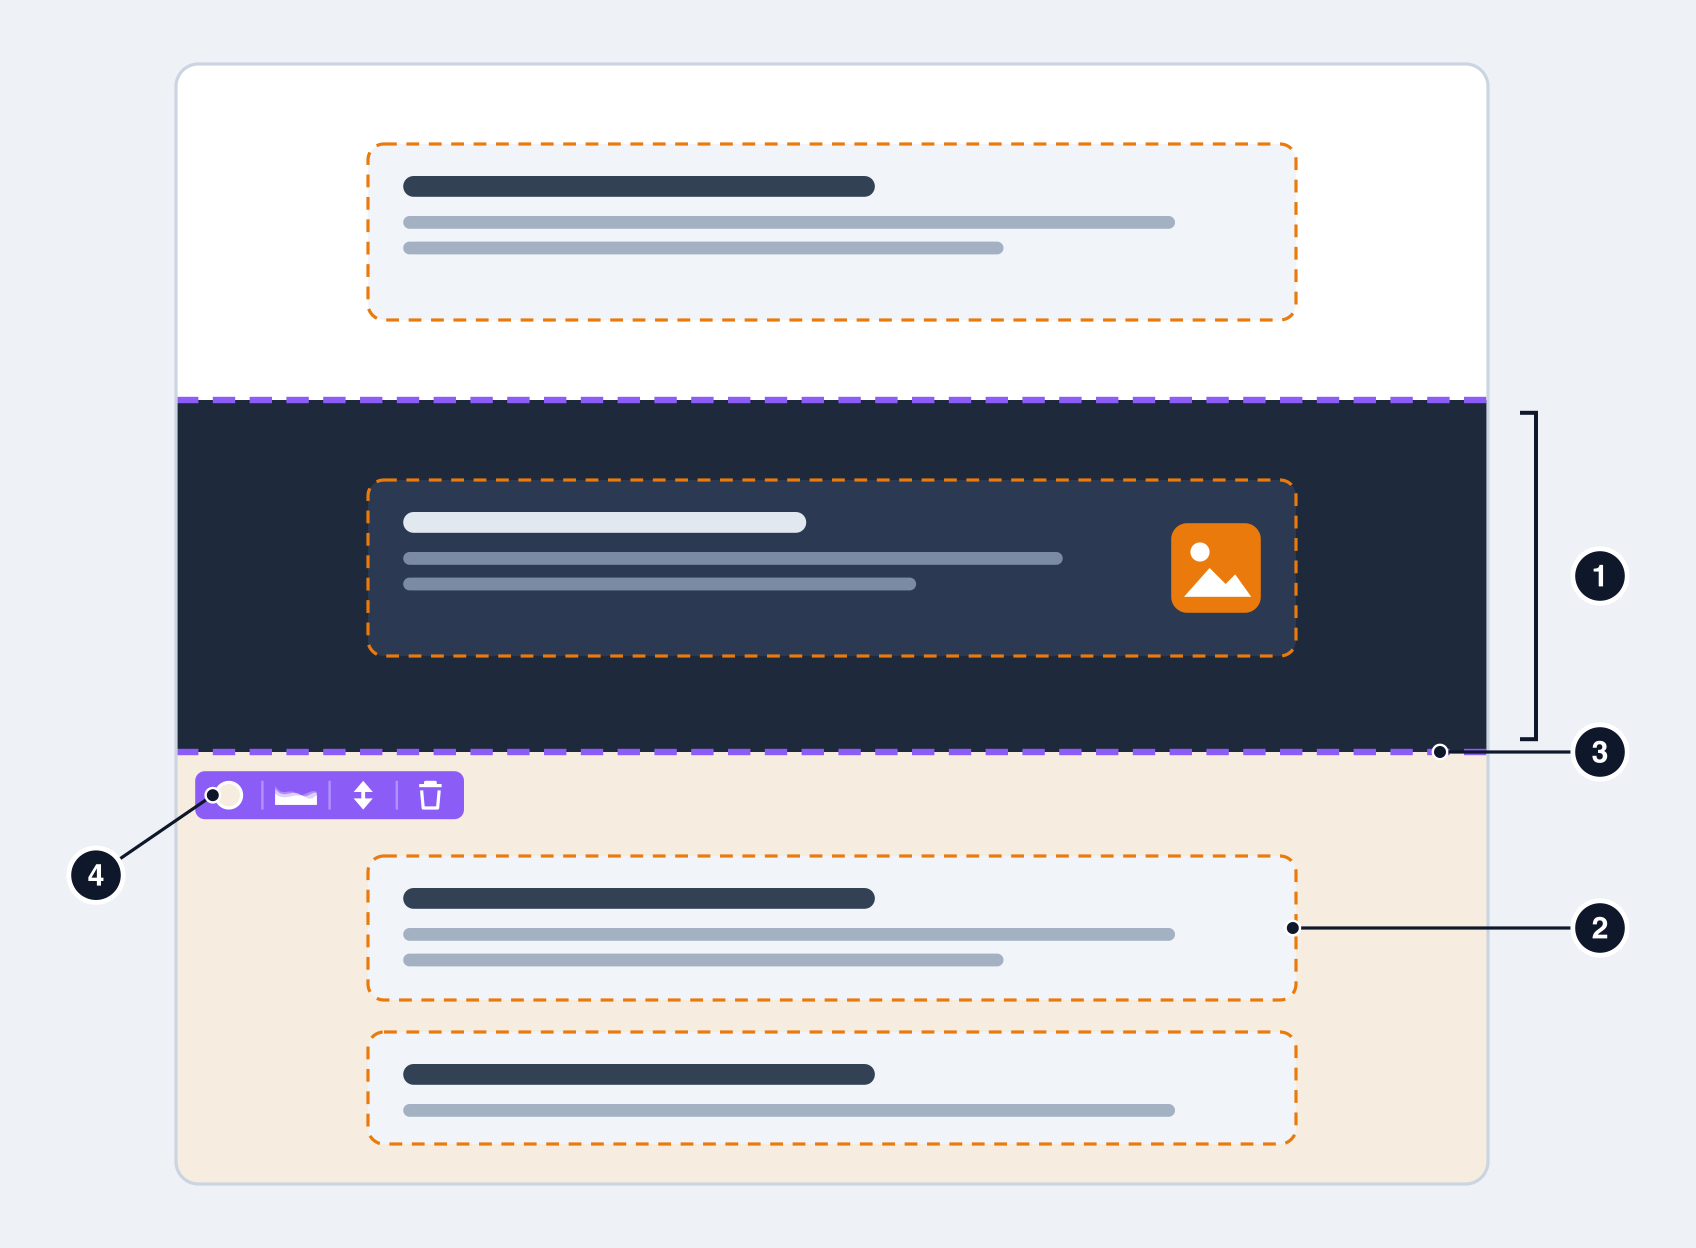
- The section is a horizontal band running right across the page. It is what carries the background: light, dark, gradient, image or video.
- The component is a block of content (heading, text, photos, form…) placed in a section. It has no background of its own: it takes that of its section, and on a dark background its text turns light all by itself.
- The separator is the boundary between two sections. Everything below a separator, up to the next one, belongs to the same section.
- The section bar appears at the top left when you hover over a section: Section background (the swatch shows the current background), Top seam, Move this section and Delete the separator.
Cutting a section in two: the Separator
- Click Separator, the purple button on the toolbar.

- Purple lines appear between the components, with a last one right at the bottom of the page: these are the places where the boundary can go. Click one of them. Esc cancels.
- A new section begins at that spot. The component just below the line, and all those that follow it in the same section, move into it.
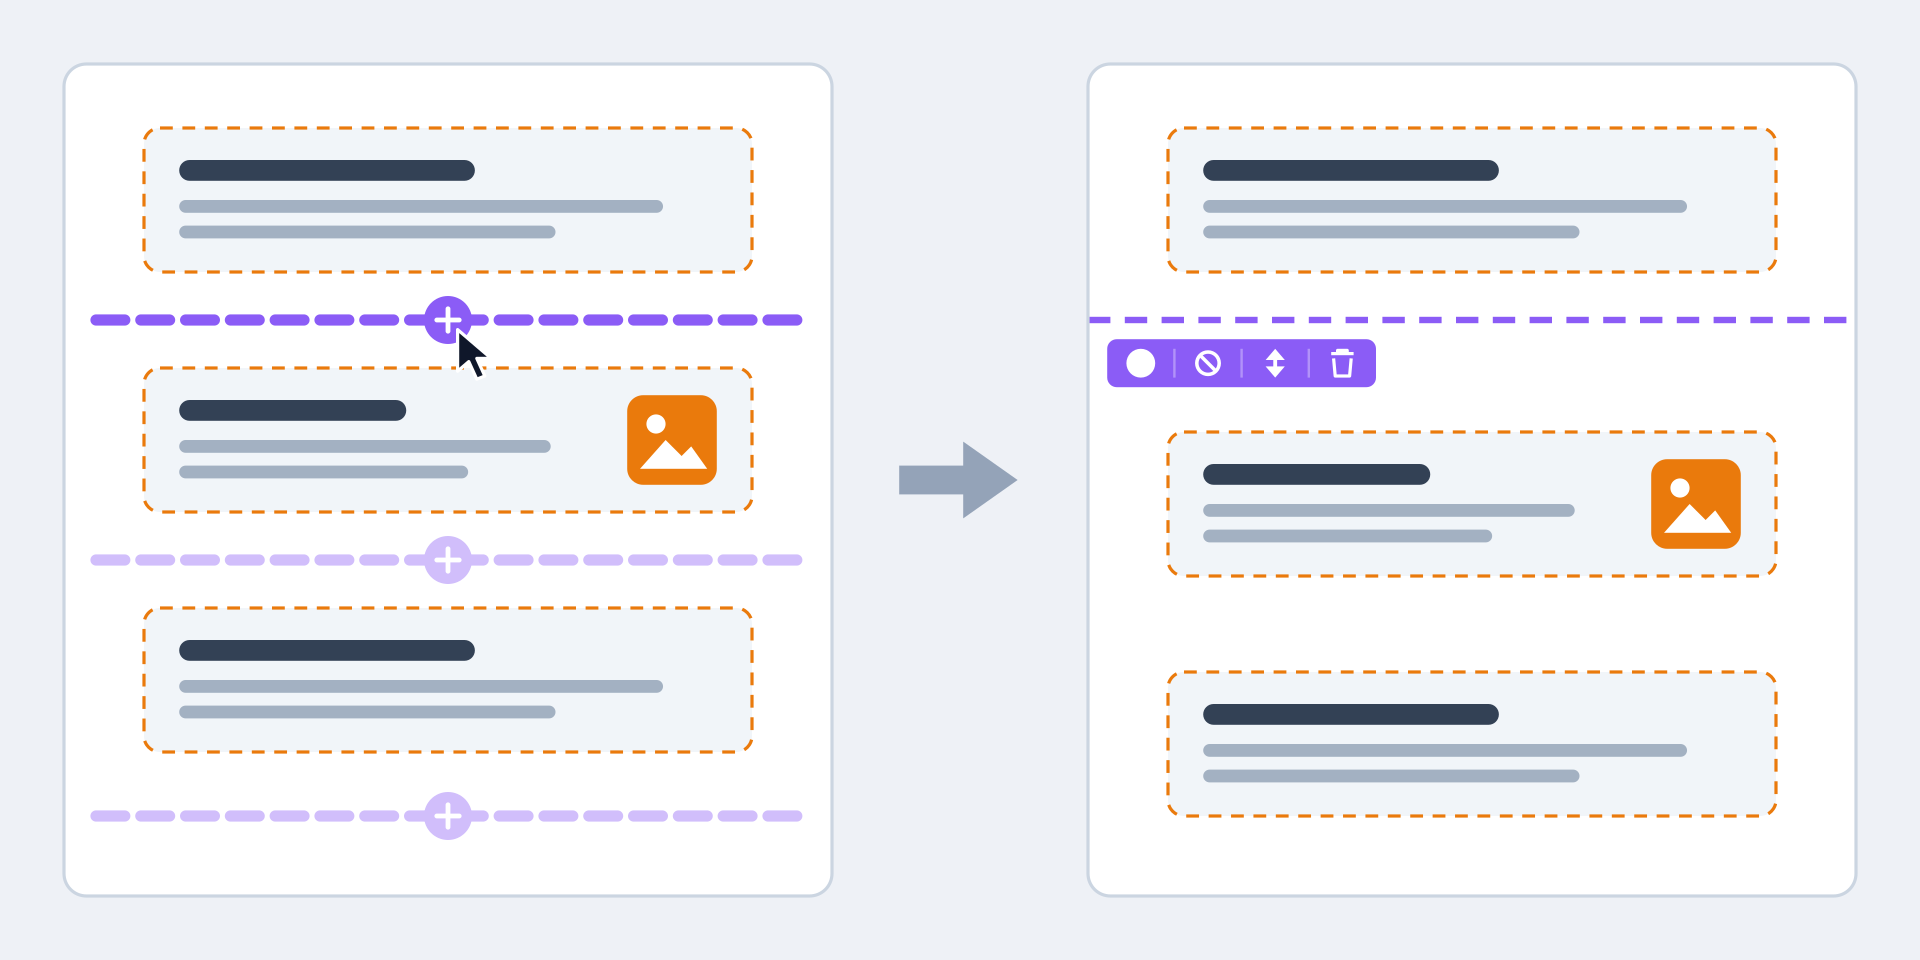
The new section starts with a Light background, margins of 80 pixels at the top and bottom, and no seam. So if the section you cut was already light, nothing changes on screen, which is normal: open Section background in the new section's bar to give it a background of its own. The line right at the bottom of the page adds an empty section, ready to receive components.
Deleting or moving a separator
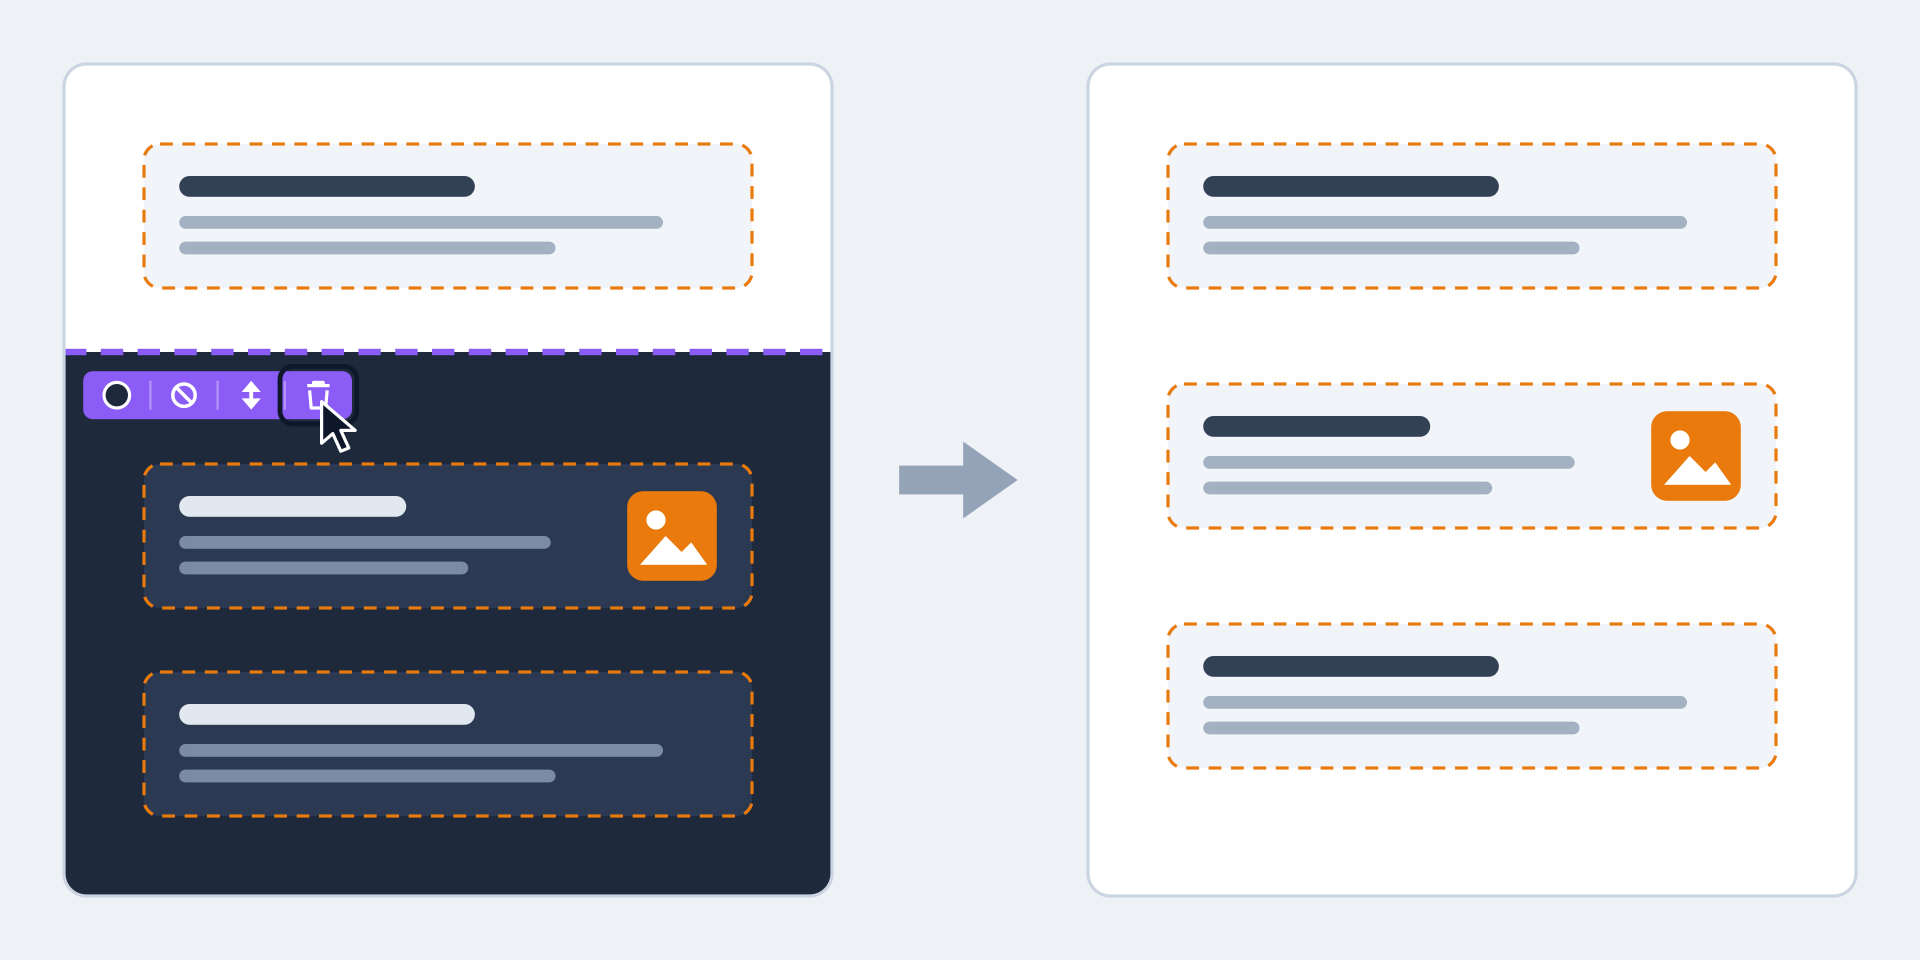
The bin on the bar, Delete the separator, deletes no content. It removes the boundary: the section's components join the section above and take on its background. The background and seam of the deleted section disappear with it.
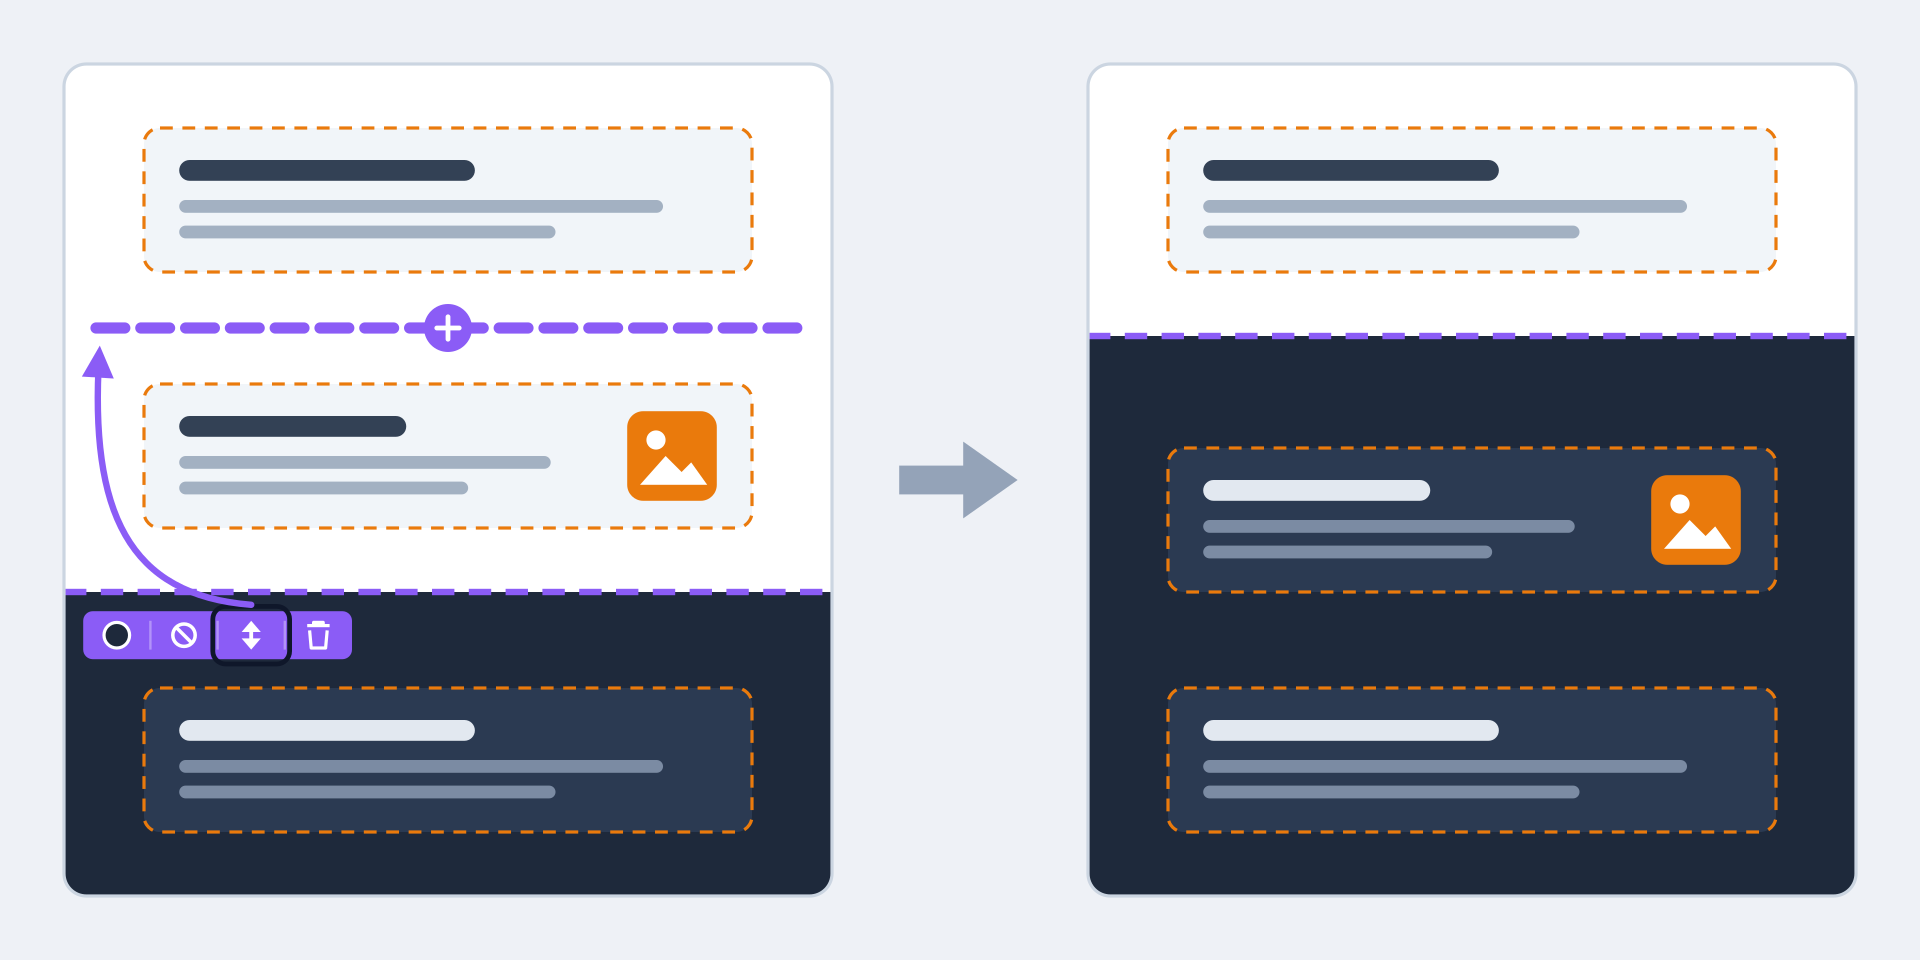
The arrows on the bar, Move this section, move the boundary, not the content. The purple lines reappear: click where the section should now begin. The background and seam stay attached to the separator. The components themselves do not move, but any that end up on the other side of the boundary change section, and therefore background.
Moving a component to another section
To move a single component, hover over it, click Move this component in its small orange bar, then click the spot you want, in any section. Once in its new section, it takes on that section's background: its dark text on a light background becomes light text on a dark background, with no setting to change on your part.
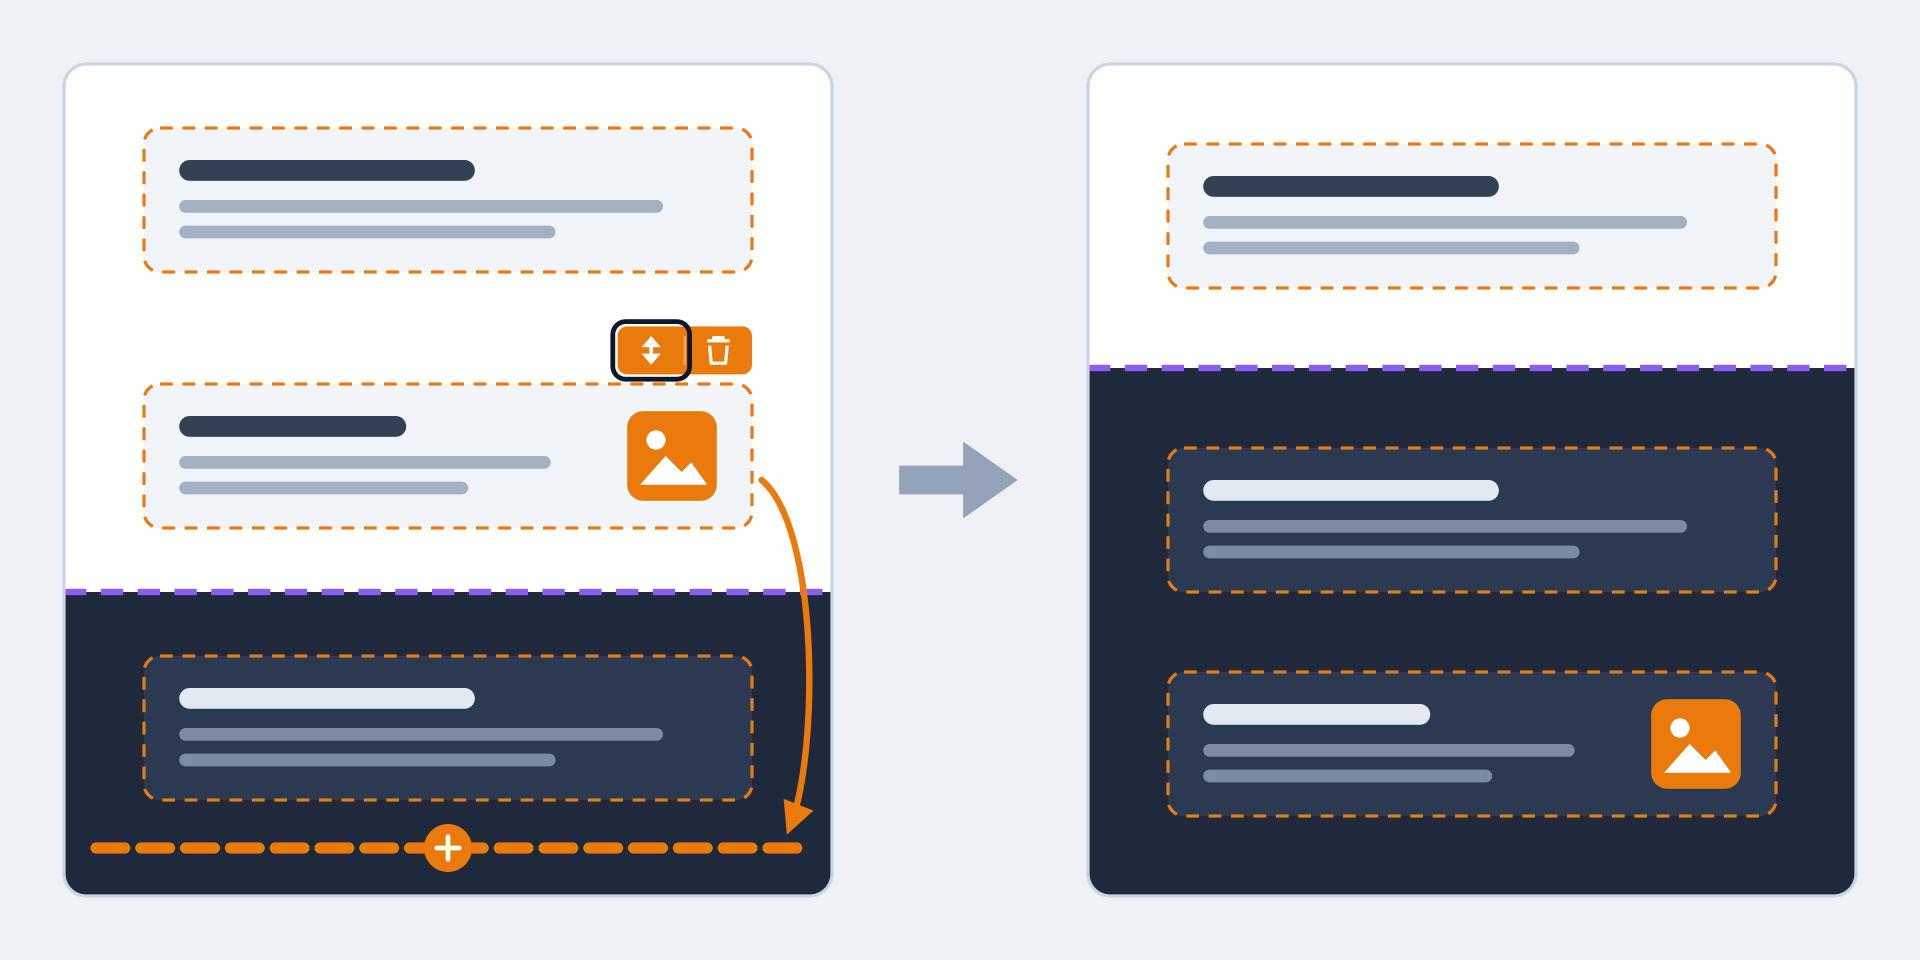
A component is always wholly within a single section, never straddling two. A section from which you have removed every component stays in place with the Empty section badge: place a component back in it, or delete its separator.
The seam: the shape of the boundary
By default, two sections meet along a straight edge. The seam replaces that edge with a shape: a wave, a curve, mountains… It is always set on the section below, using its Top seam button: it is the top edge of that section that it draws.
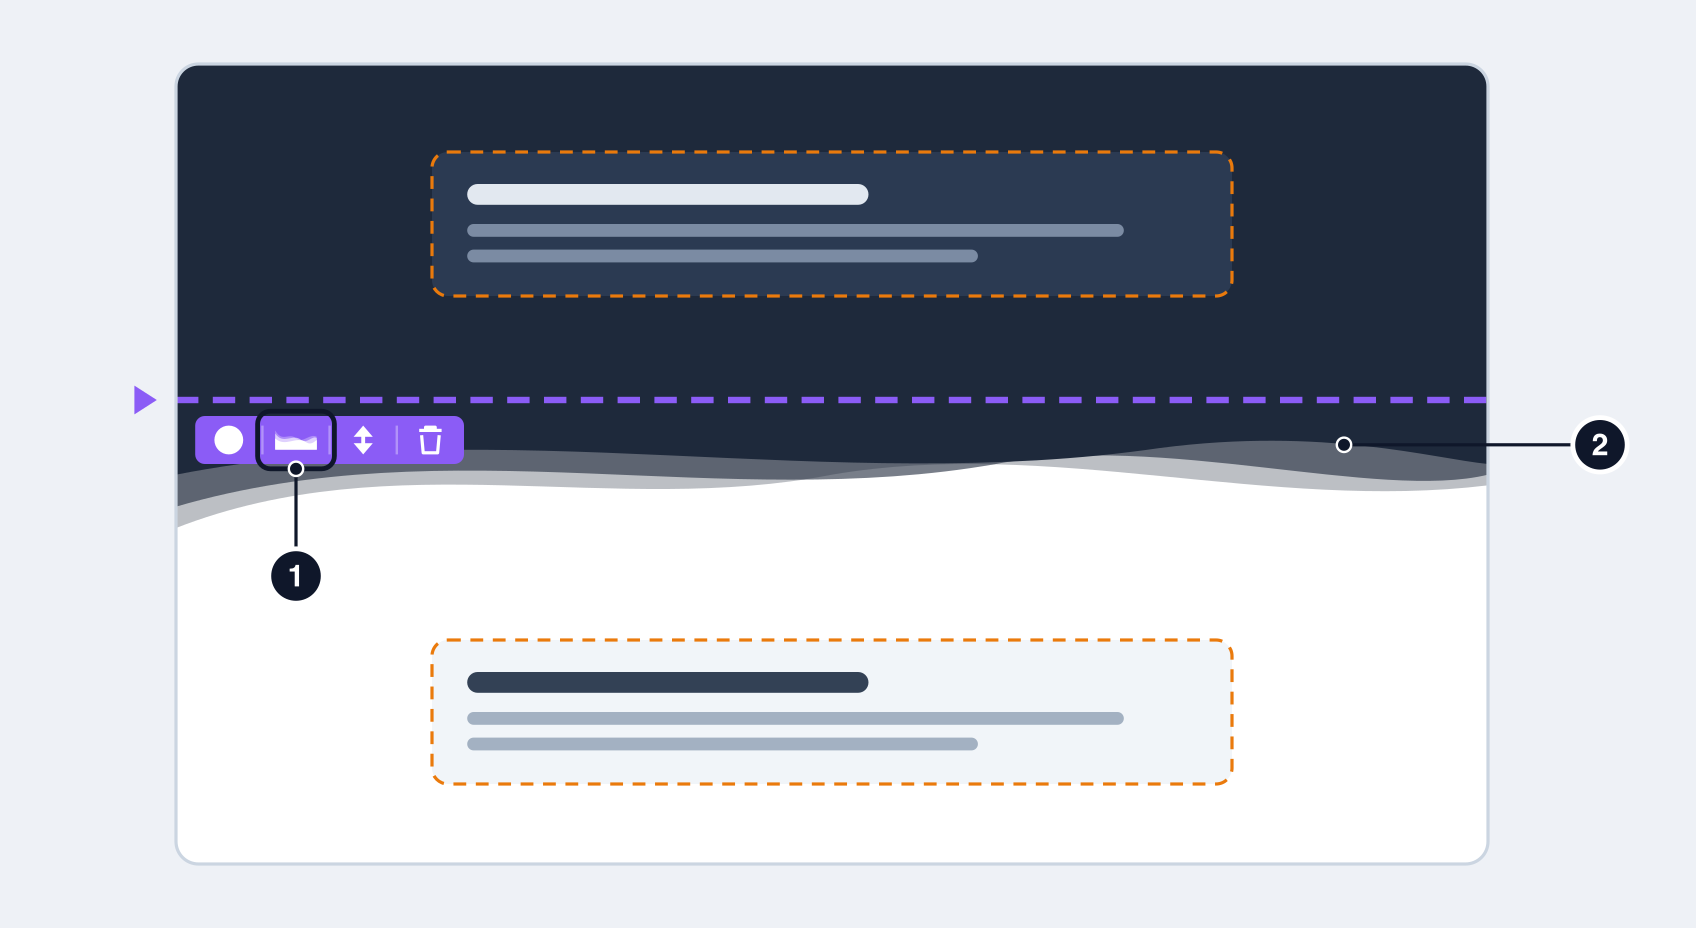
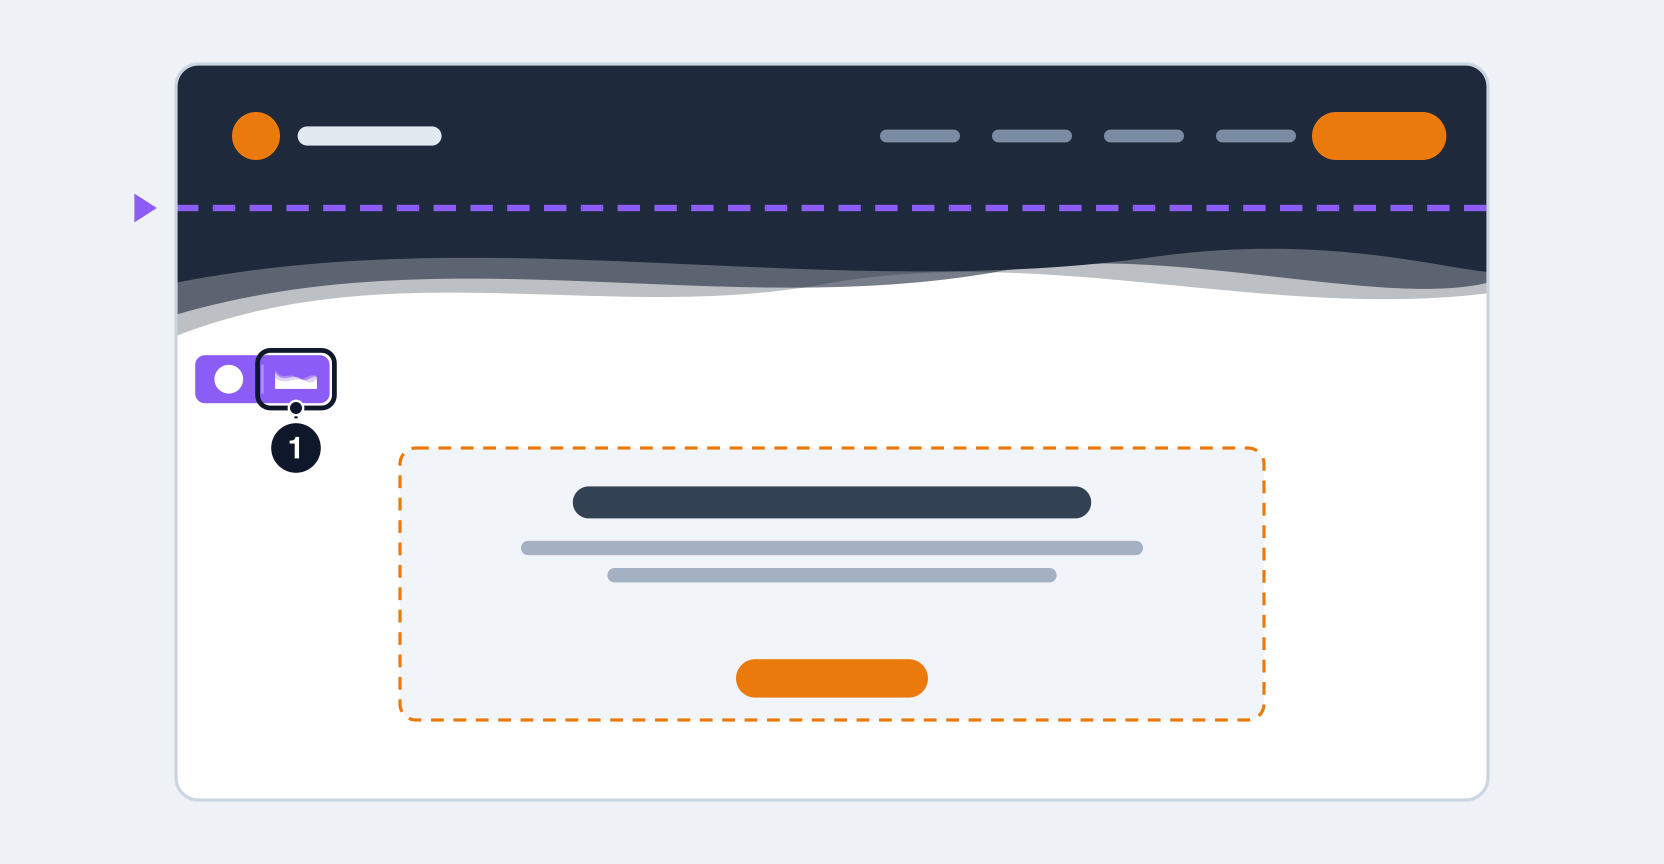
- The Top seam button, in the bar of the section below. Its small image shows the chosen shape; a crossed-out circle means "no seam".
- The shape, painted in the colour of the section above: that colour seems to flow down into the section below.
The button opens the Seam (separator) panel. It offers the straight edge (the crossed-out circle) and eleven shapes: click one and the page changes at once, there is nothing to confirm.
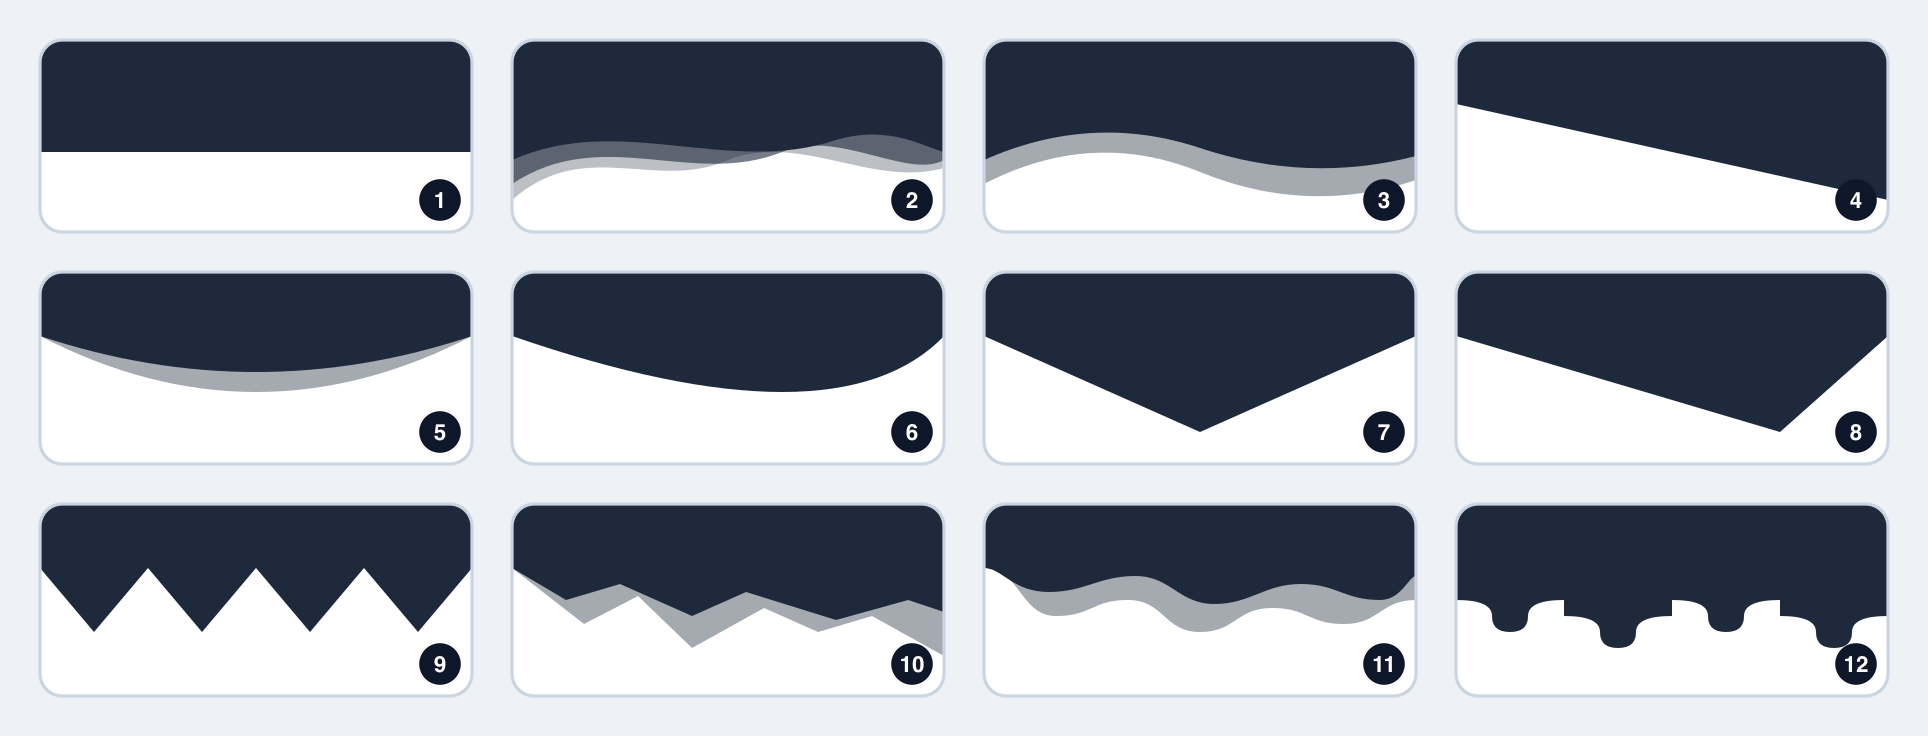
In order: 1 straight edge, 2 wave, 3 soft wave, 4 diagonal, 5 curve, 6 asymmetric curve, 7 triangle, 8 asymmetric triangle, 9 zigzag, 10 mountains, 11 clouds, 12 drops.
Overlap: where the shape is drawn
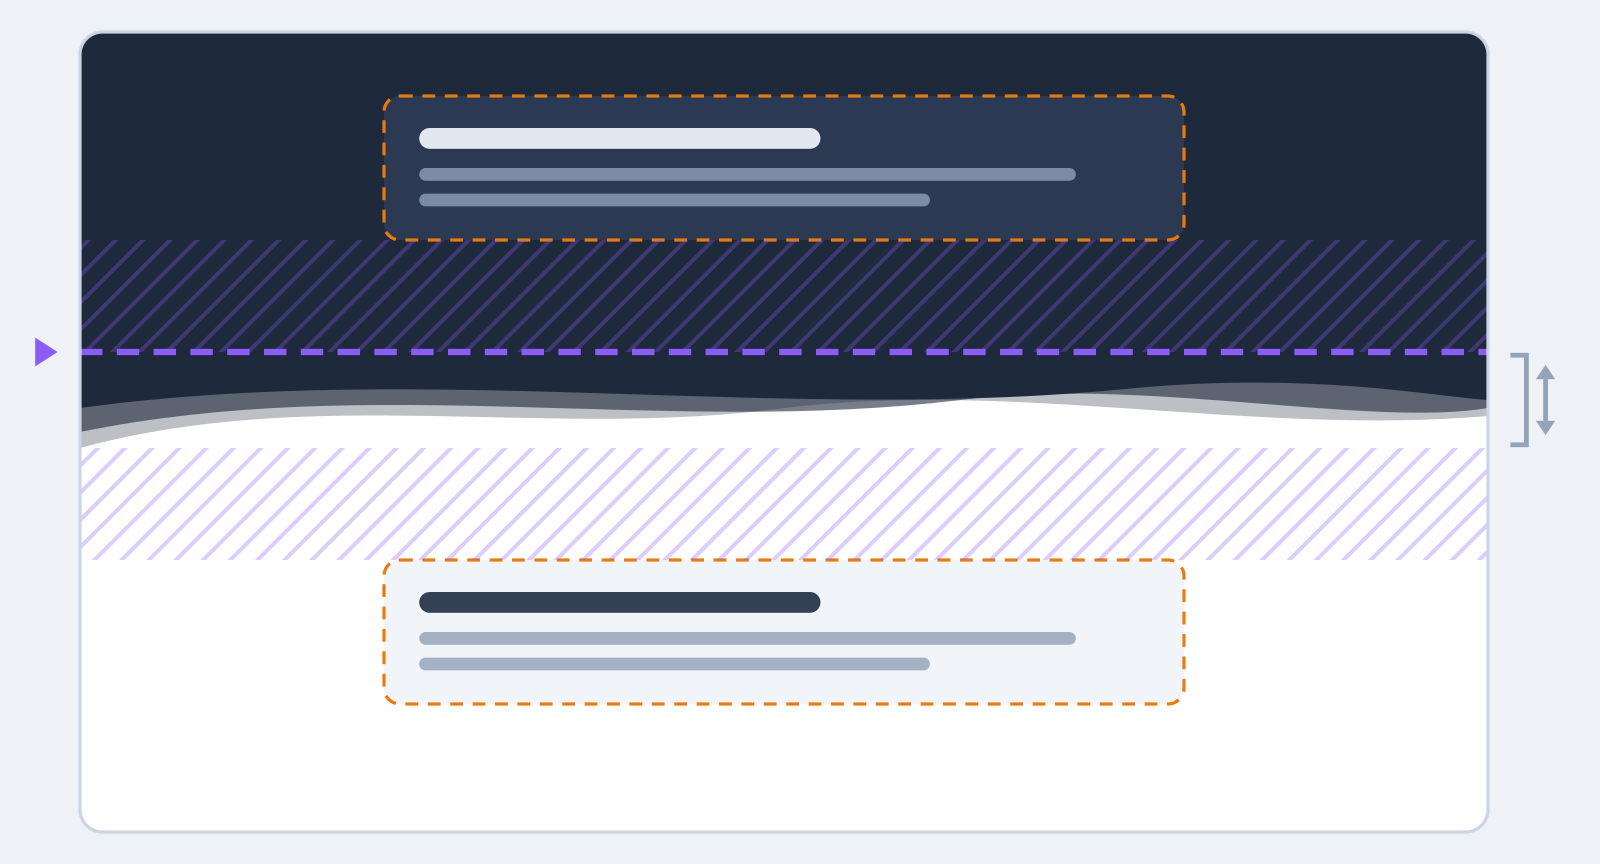
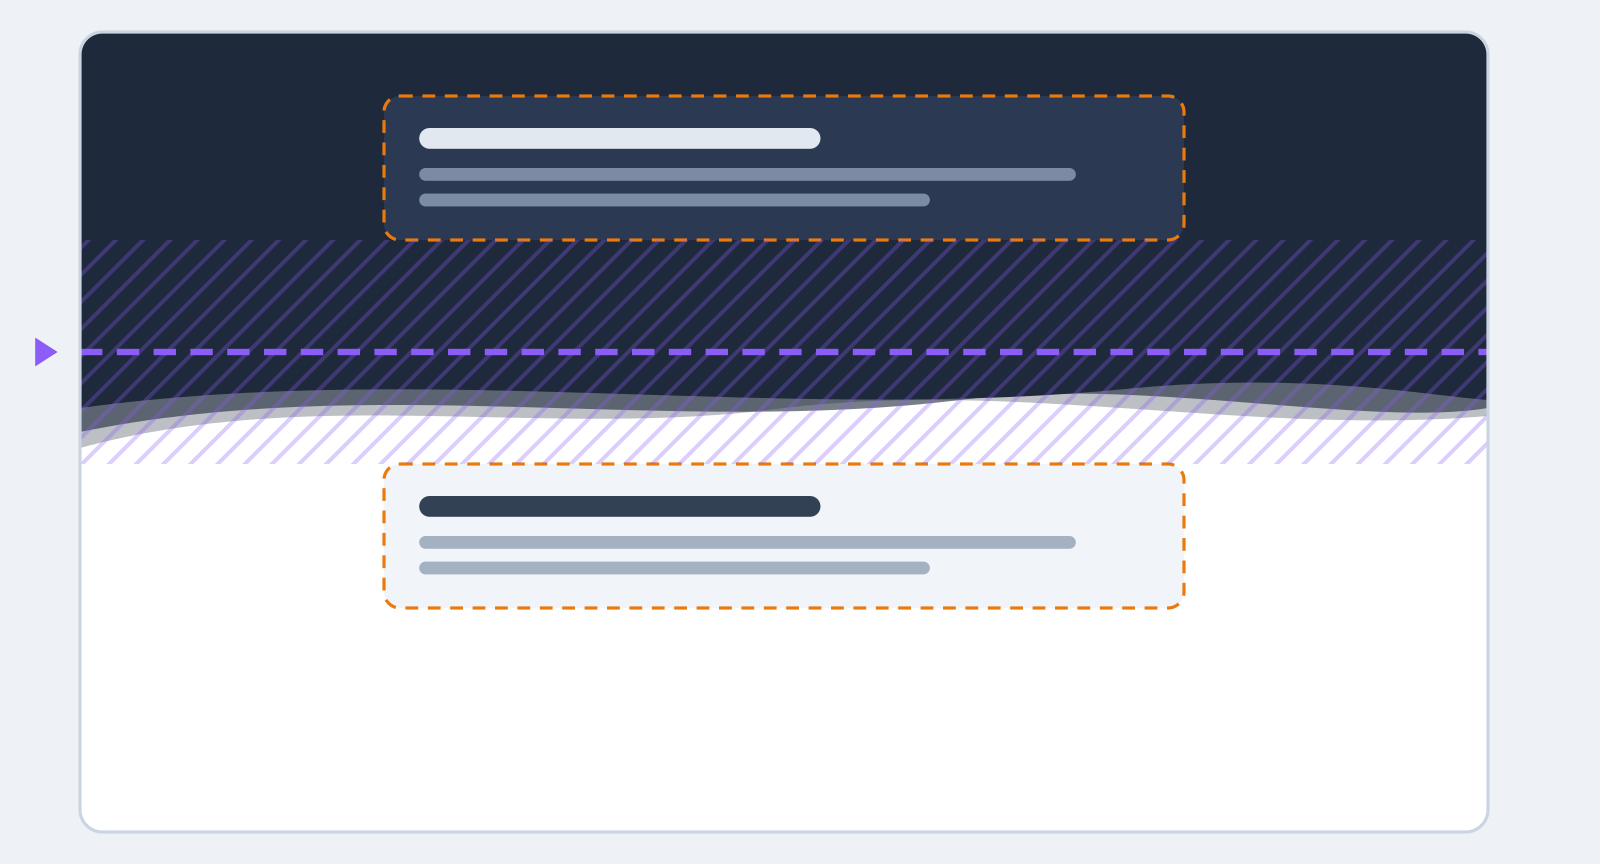
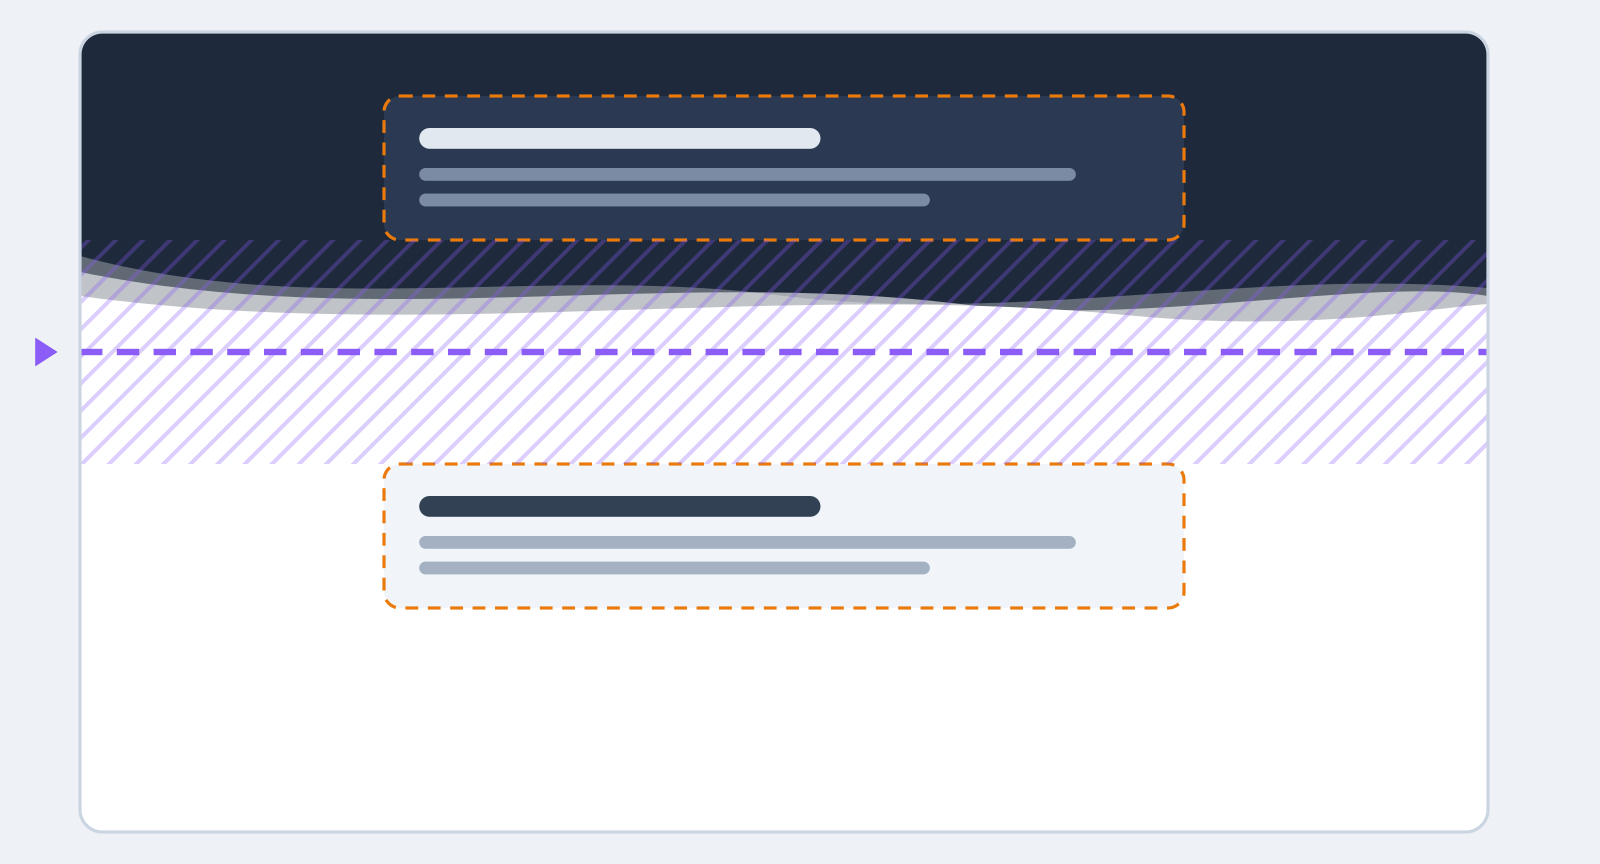
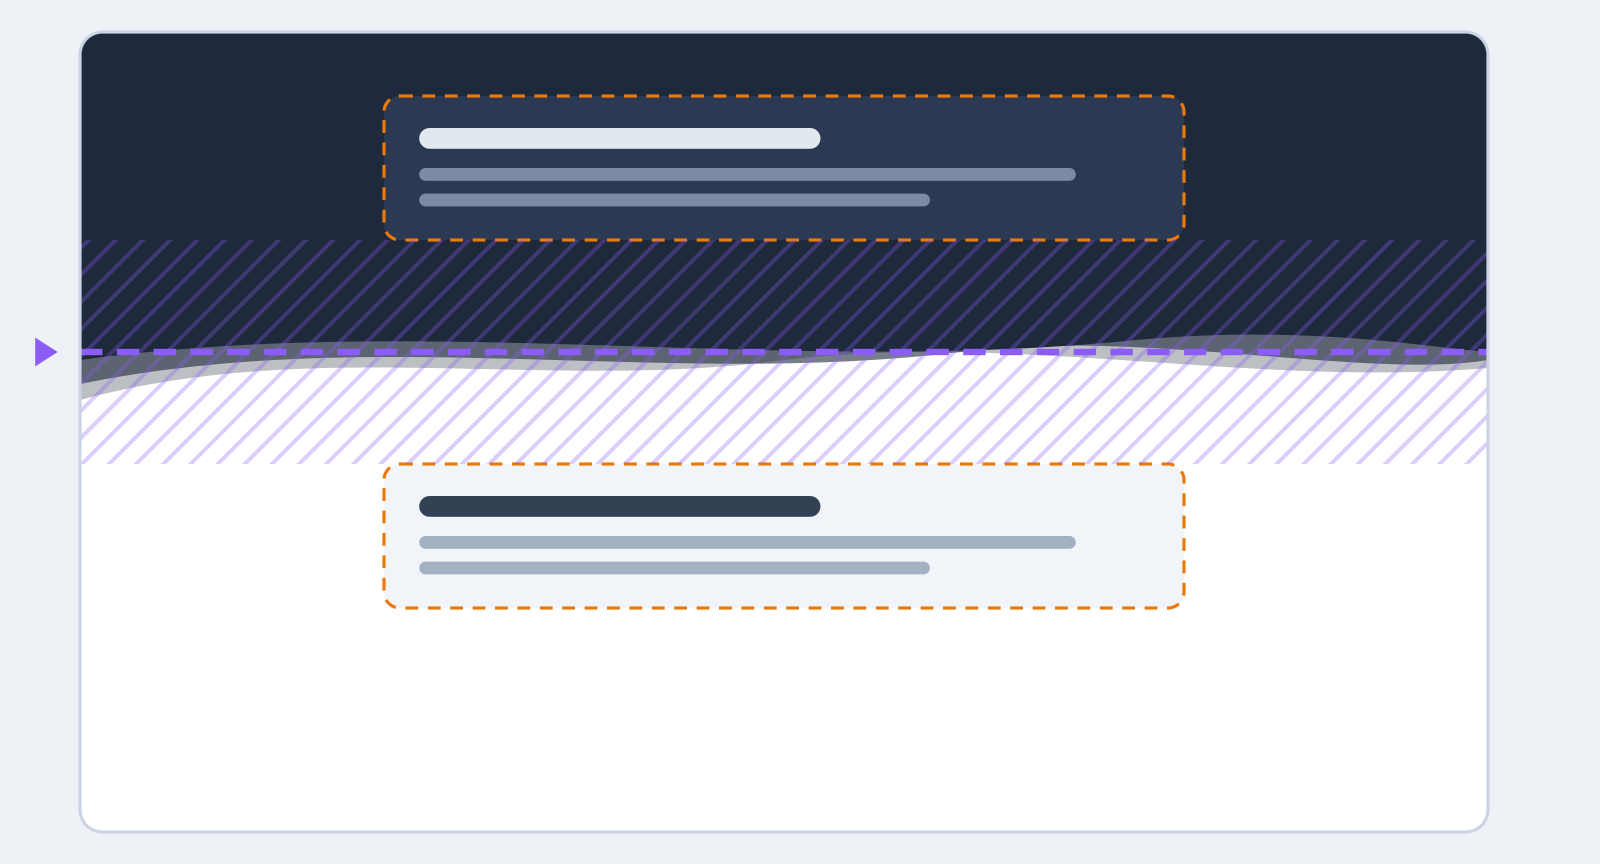
The shape has a height. The Overlap setting says where to place it in relation to the boundary. In the diagrams that follow, the purple line marks the boundary, and the hatching marks the sections' margins: the free space each section keeps above and below its content.
Overlap "none" (the default setting)
The shape takes up its own space, at the top of the section below: the page grows taller by the height of the shape, and nothing is covered. This is the safest choice.
Overlap "below"
The shape moves down into the section below, into its top margin. The page does not grow taller, and the background from above seems to flow down into the section.
Overlap "above"
The shape moves up into the section above, over its bottom margin, with the background of the section below: it is the lower section that seems to spill upward.
Overlap "centre"
The shape sits astride the boundary, half in each section.
When the shape hides a component
With above, and for its upper half with center, the shape rises over the bottom of the section above. As long as it fits within the margin, all is well. If it is taller than the margin, it hides the bottom of the component. With below, the component sits on top of the shape, but if it touches the shape, its text is harder to read.
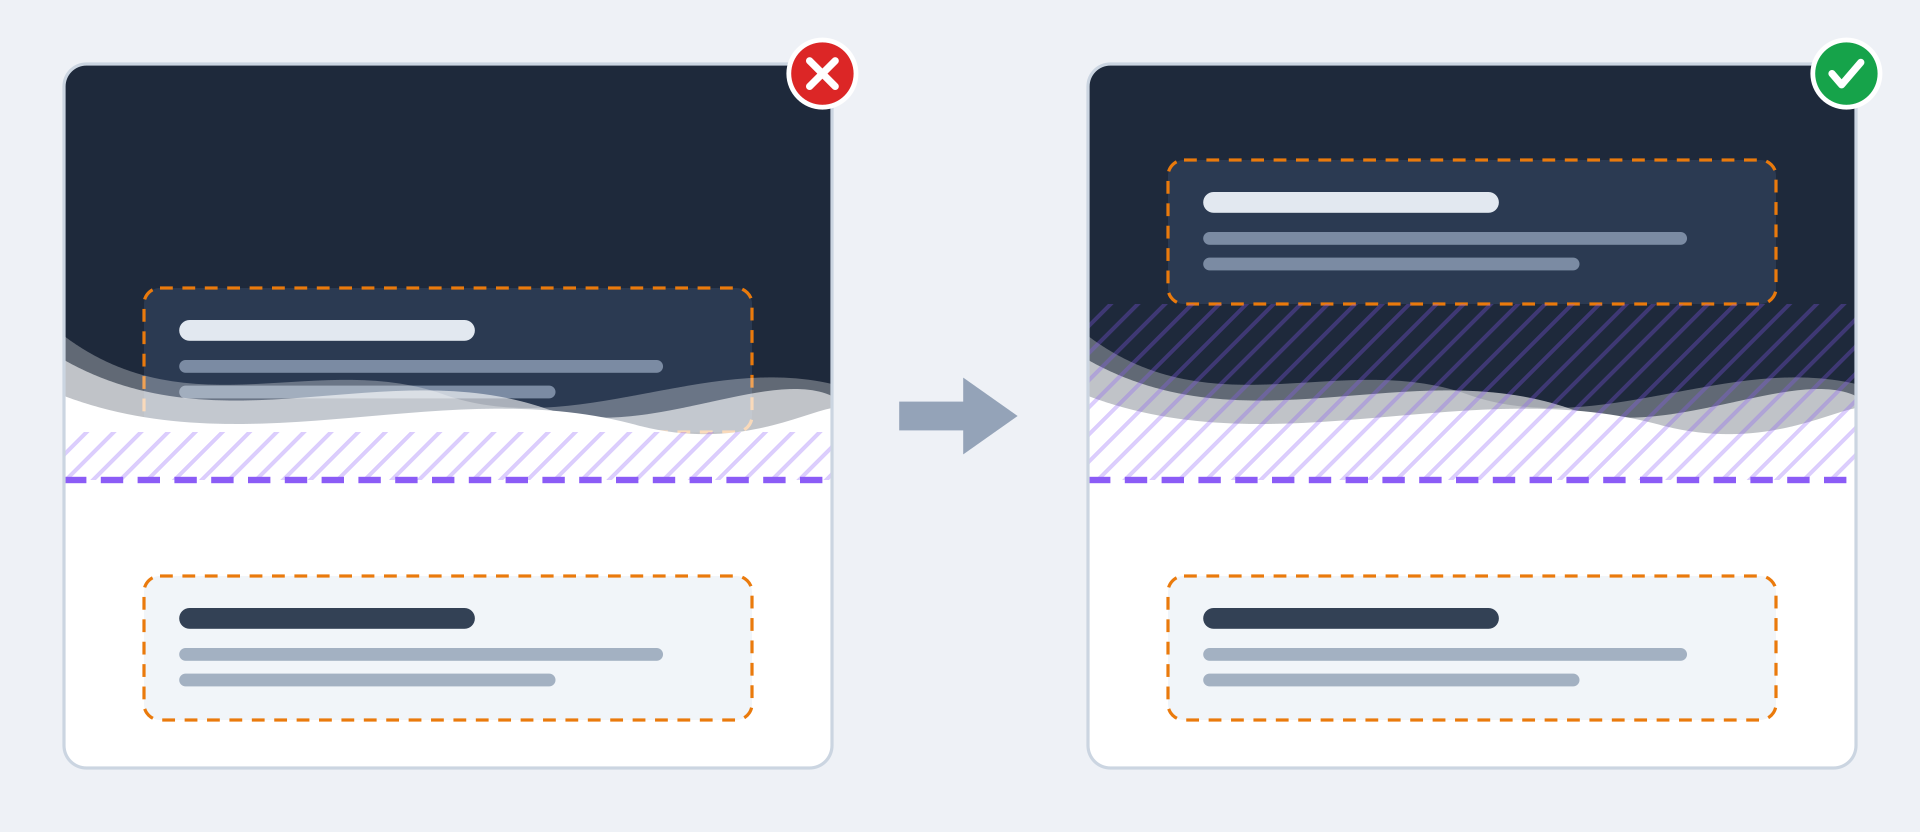
- Enlarge the margin: in Section background, under Margins, the Top field of the section below for overlap below, the Bottom field of the section above for overlap above, both for centre.
- Reduce the height of the seam.
- Switch the overlap to "none": the shape then takes up its own space and no longer covers anything.
Layers, height, width and mirror
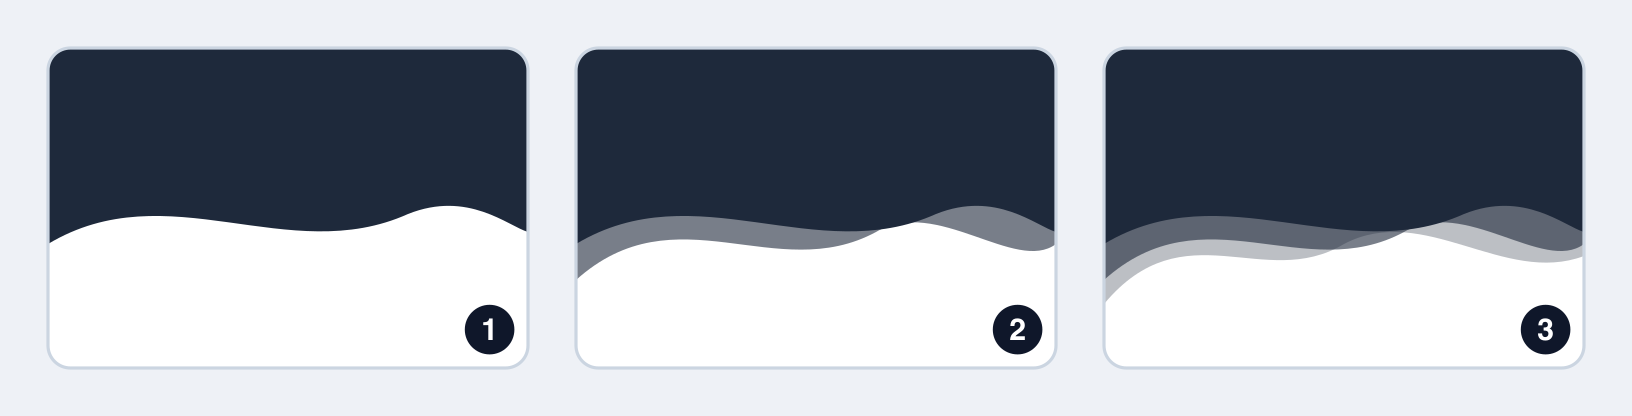
Layers: the wave, the soft wave, the curve, the mountains and the clouds are made up of several layers: a solid shape at the front, and behind it one or two shapes in the same colour, semi-transparent. The Layers setting chooses how many to keep, starting from the front one: 1 gives a simple, crisp shape, the maximum (3 for the wave, 2 for the others) gives depth. It only appears for these five shapes, and choosing another shape restores all of its layers.
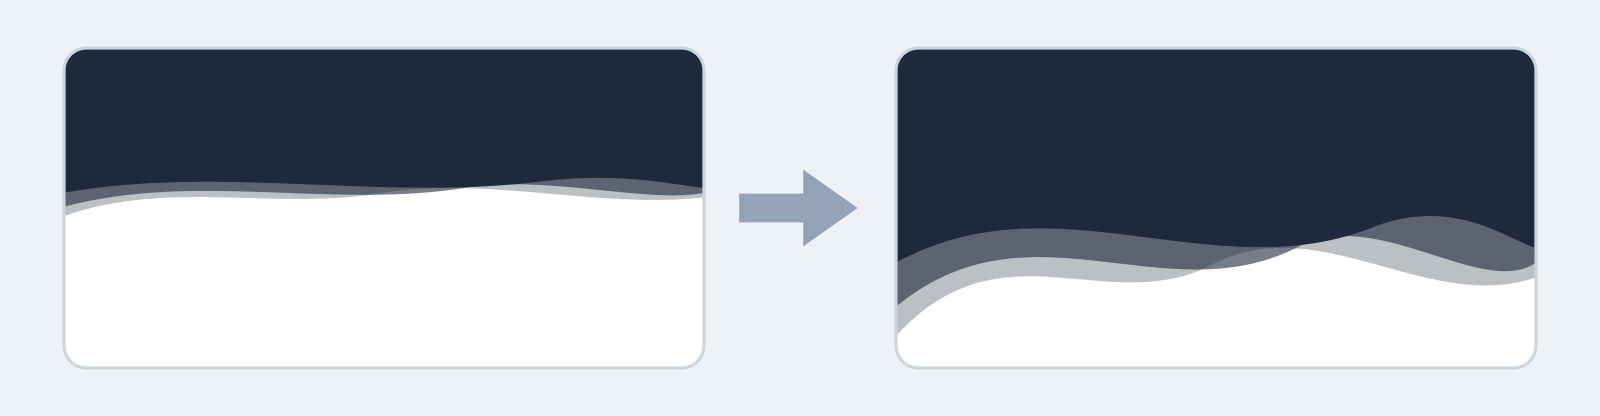
Height: the height of the shape, in pixels (60 by default, up to 200). On a mobile, it shrinks all by itself, down to half.
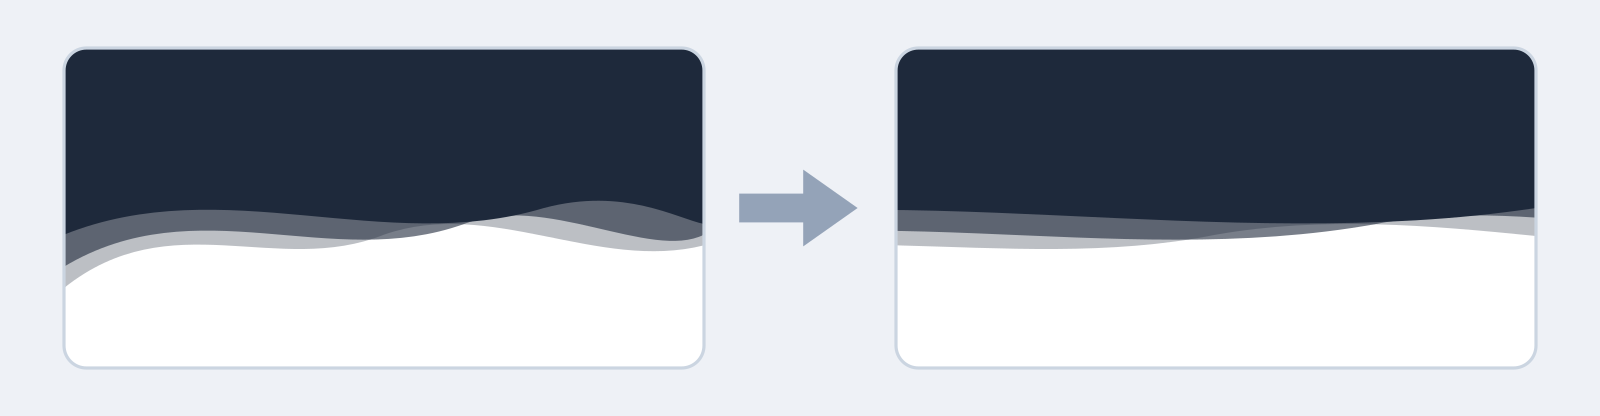
Width %: at 100%, the pattern fits exactly within the width of the page. Beyond that (up to 300%), it stretches: the waves lengthen and only the central part of the pattern remains visible.
Horizontal mirror: flips the shape from left to right. Handy with asymmetric shapes, to alternate the direction from one section to the next.

Why my seam isn't showing
The shape draws the boundary between the background of one section and that of the other. If both sections have the same background, it is indeed there, but invisible. The panel warns you: "Invisible seam: this section and the previous one have the same background." Give one of the two sections a different background.
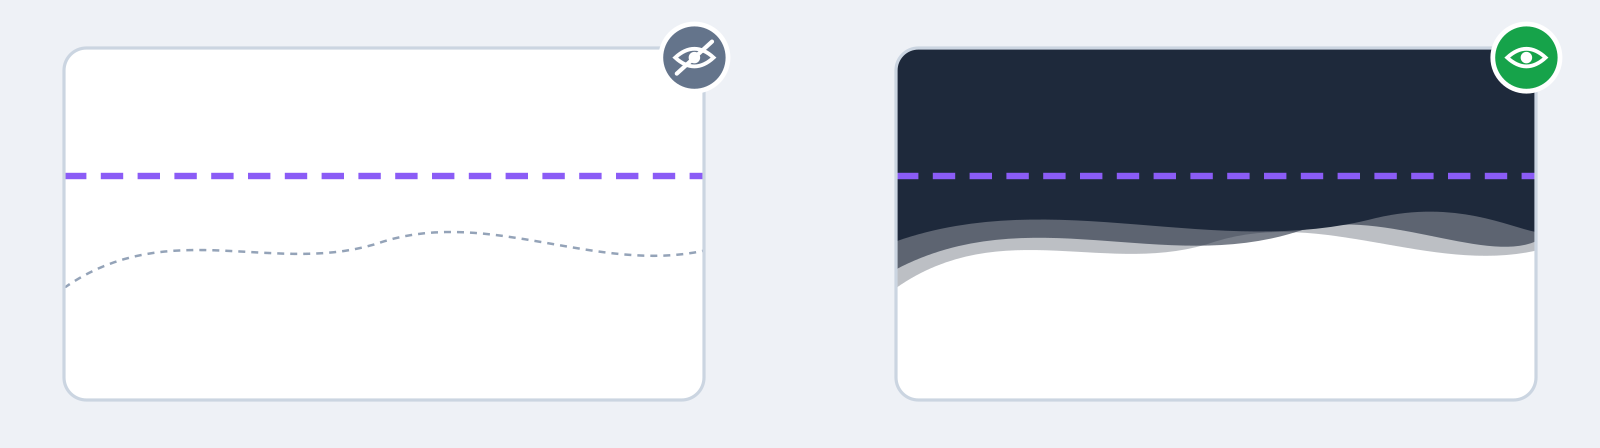
A wave beneath the header
The header has no Top seam button: there is no section above it. To draw a wave beneath the header, set the seam of the first section on the page, with the below overlap: the shape takes on the color of the header and falls into the page. If the header stays visible while scrolling, above is grayed out: the header would cover the shape.
The same logic applies at the bottom of the page: the footer's seam is set on the footer, and takes on the background of the last section of each page. As that background changes from one page to another, the footer editor replaces it with a checkered band, "End of page".
Setting a section's background →