Contact forms
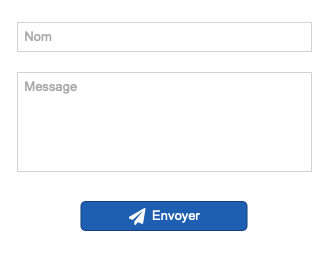
The forms are composed of fields (text, list, etc.) and a button that will send this information to the server.
The default behavior of the form is to send an email to your email address.
Creating a form
The creation is very simple, a form button (Send button) and the fields of your choice
The sending itself is then done via your hosting,
Simple sending of a form
The default sending system simply requires you to enter your email address (To).
Tip
Save time by entering your email address in the general properties of your site so that you don’t have to enter it each time you create a new form.
Sending doesn’t work with my web host
You do not receive the email or an error occurs during the sending.
There are limitations with some hosting providers.
Contact your web host and ask for a PHP code that works.
You can test this code directly with the personalized sending in WebAcappella
Tip
Test the operation of the PHP mail function of your web host
Basic example of a code to be copied by replacing the value of the e-mail address.
<?php

//// appel de la fonction mail
//// Demandez à votre hébergeur les parametres particuliers
//// necessaires pour la fonction mail

$result= mail( "adresse@fai.com", "Test WebAcappella form", "Test message !");

//// fin appel de la fonction mail

echo json_encode(['success'=>$result,'message'=>"Error occured !"]);
If the code works, do not hesitate to contact us to add some parameters in WebAcappella in order to facilitate the use of the forms.
Warning
We do not provide technical support for sending problems, as they are dependent on the operating or configuration hazards of the hosting. This page should help you in case of problems:
Customized PHP upload
If you have some knowledge of PHP you can fully customize the sending of forms with the PHP mail function
https://www.php.net/manual/fr/function.mail.php
Classic PHP example of sending mail
<?php

//Retrieve a WebAcappella input field value
$my_field_value = $_POST["field_id_dba6f698_fe51_4e56_8dc7_b2b87047e66d"];

$message ="";
$message .= "My field value : ".$my_field_value;


$result= mail( "adresse@fai.com", "Test WebAcappella form", $message);

echo json_encode(['success'=>$result,'message'=>"Error occured"]);
Tip
The personalized sending allows you to test directly any particular settings of the mail function that your host will have communicated to you
Advanced PHP code example
Below is an example of more advanced code (https://php.developpez.com)
<?php
$destinataire = 'adresse@fai.com';
// Pour les champs $expediteur / $copie / $destinataire,
// séparez par une virgule s'il y a plusieurs adresses
$expediteur = 'adresse@fai.com';
$copie = 'adresse@fai.com';
$copie_cachee = 'adresse@fai.com';
$objet = 'Test'; // Objet du message
$headers  = 'MIME-Version: 1.0' . "\n"; // Version MIME
$headers .= 'Reply-To: '.$expediteur."\n"; // Mail de reponse
$headers .= 'From: "Nom_de_expediteur"<'.$expediteur.'>'."\n"; // Expediteur
$headers .= 'Delivered-to: '.$destinataire."\n"; // Destinataire
$headers .= 'Cc: '.$copie."\n"; // Copie Cc
$headers .= 'Bcc: '.$copie_cachee."\n\n"; // Copie cachée Bcc
$message = 'Un Bonjour de Developpez.com!';

$success = false;
$error_string="";
if (mail($destinataire, $objet, $message, $headers)) // Envoi du message
{
    $success=true;
}
else //
{
    $success=false;
    $error_string="Non envoyé !";
}

echo json_encode(['success'=>$success,'message'=>$error_string]);